

All posts by Admin

Together Is Everything: How to Make Your Pet Part of Your Wedding

Photo Bill Reid

Your wedding day is a celebration of love, and that includes the furry family members who’ve been part of your journey. Pets have a way of adding joy, warmth, and even a few hilarious surprises to your big day. With a bit of planning and creativity, you can make sure your four-legged friend feels right at home during the festivities.

Key Highlights

  • Choose roles that fit your pet’s personality and comfort level.
  • Prepare a pet care plan and designate a trusted handler.
  • Incorporate pet-themed touches into decor, invites, and favors.
  • Capture beautiful moments with your pet through photos and keepsakes.
  • Always prioritize your pet’s comfort and safety above aesthetics.

Design a Ceremony That Includes Every Family Member

Whether your dog walks down the aisle as a ring bearer or your cat supervises from a comfy corner, there’s a way to include them meaningfully. Start by considering your pet’s temperament and environment tolerance. Loud music or large crowds might overwhelm some animals, while others thrive on the attention.

A simple way to gauge readiness is to schedule a rehearsal day where your pet can explore the venue, and test their comfort with noise, scents, and surfaces.

A Quick Comparison of Pet Roles and Comfort Levels

Here’s how different pets might best fit into the celebration based on common roles and needs:

Pet TypeIdeal Wedding RoleComfort TipsBest for Indoor/Outdoor?
DogRing bearer or aisle escortProvide water breaks, treats, and shadeOutdoor or indoor
CatGuest of honor or photo cameoKeep a quiet space nearbyIndoor
RabbitDecorative companion (supervised)Gentle handling, no loud musicIndoor
HorseGrand entrance ride or photo momentUse a handler and gradual introductionOutdoor
BirdSymbolic release or photo prop (trained only)Ensure proper supervisionOutdoor

Tips to Plan Your Celebration

Incorporating pets requires both creativity and structure. Here’s a streamlined checklist to help everything go smoothly on the big day. Before you finalize your plans, make sure to:

  • Confirm with the venue that pets are welcome and understand any restrictions.
  • Hire or assign a pet handler to manage your furry friend throughout the event.
  • Schedule grooming or a vet visit a few days before the wedding.
  • Prepare a pet emergency kit (water, wipes, snacks, waste bags).
  • Practice with props like flower collars or leashes to ensure comfort.
  • Inform guests and vendors in advance if a pet will be present.

Craft Invitations That Feature Your Pet’s Personality

Your wedding stationery can also celebrate your furry companion. Including an illustration or photo of your pet in your invitation design adds a charming, personal touch. Many couples commission custom portraits of their pets in wedding attire or playful poses to print on invites, menus, or thank-you cards.

An easy way to achieve this is by using an online design tool that lets you create printable party invites. Such platforms allow users to design and order custom-printed invitations using free templates, fonts, and images, a great way to blend creativity with convenience.

Creative Ways to Include Pets Without the Stress

Even if your pet can’t attend physically, their spirit can be part of the celebration. You might:

  • Display a framed portrait or digital slideshow of your pet near the welcome table.
  • Serve signature cocktails named after them.
  • Offer pet-themed favors like paw-print cookies or animal-shaped candles.
  • Add custom signage that references your furry family member (“Paws-itively in love!”).

These small, symbolic gestures can make your day feel complete while ensuring your pet stays happy and safe.

Practical Advice for a Smooth Celebration

Here are some practical tips that can help you prepare thoughtfully:

  • Coordinate with your photographer to capture moments with your pet early in the day before the crowd gathers.
  • Keep backup plans; sometimes pets may refuse to cooperate (and that’s okay).
  • Avoid confetti or décor that could be harmful if ingested.
  • Choose non-toxic flowers if your pet will be close to bouquets or centerpieces.

Remember, the goal is to include them joyfully, not stressfully.

FAQ

Before you finalize your plans, here are some common questions and answers that can help ensure everything goes off without a hitch.

What if my pet gets anxious around large crowds?
You can still include them symbolically. Have a pre-wedding photo shoot or use their likeness in your decor or invitations. That way, your pet remains part of the celebration without discomfort.

Can I have my dog walk down the aisle?
Absolutely, but practice beforehand. Use familiar commands and have a handler waiting with treats or toys at the end of the aisle to keep them calm and focused.

Are there special outfits for pets at weddings?
Yes! Many designers create lightweight tuxedos, floral collars, and bow ties for pets. Always ensure the attire allows free movement and doesn’t cause overheating.

What should I do if my venue doesn’t allow pets?
Ask about exceptions for short appearances during photos. If not possible, include your pet virtually; for example, through video, photos, or custom printed designs.

Can pets attend the reception too?
It depends on their temperament. Some pets enjoy mingling, while others may find it overwhelming. Consider having them attend for a brief appearance, then relax with a caretaker nearby.

What’s the best way to clean up after my pet during the event?
Assign a handler with cleanup supplies. They should discreetly manage any accidents and keep your pet’s area tidy without interrupting the flow of the celebration.

Wrapping It Up

Weddings are about love, and pets are a big part of that love story. Including them brings laughter, authenticity, and heartwarming memories that guests will never forget. Whether they trot down the aisle, grace your invitations, or inspire your signature drink, your furry companion deserves a special place in your story.

Plan thoughtfully, keep comfort at the forefront, and let your celebration be as joyful and genuine as the love you share, tails, whiskers, and all.

Method Makeup Academy, Sacramento’s Makeup School

Avoid the Blue in Black

Does your black eye shadow always seem to look gray or worse blue-ish on you every time you apply it?  You love that smoky eyed look that everyone else seems to always be able to rock, but the black is just not your friend?

You’ve tried every brand, from MAC to Maybelline and still you can’t get your black to stay black.

Well, here’s two tricks that’ll keep your black as dark as you want it to be.

Option One:  This one costs money so if you are on a tight budget like the rest of us, skip ahead to Option Two.  Now, because I know you are still reading this, here’s the first tip.  You can purchase a good cream eye shadow of a light or nude tone.  Apply this to your whole lid, then apply the black eye shadow.  The lighter color should help the black to really pop.  But, if you’re budget demands you save your pennies and dimes, or you’re tired of buying yet another piece of makeup, try:

Option Two:  This one is simple, easy and works every time.  Apply your highlighter as you normally would, then wherever you plan to apply the black eye shadow, lightly apply a neutral medium to light brown.  Then pack your black shadow over the brown and blend out.  The soft neutral brown will cancel out any affect the black eye shadow has on your skin tone and will keep the black true, dark and fabulous to smoke out and get a sexy cat eye.

Now you have no reason to be afraid of black, get out there, grab your brushes and have fun!

Method Makeup Academy, Sacramento’s Makeup School

Dark Circle Tips

So, you’re getting enough sleep and still you have dark circles under your eyes and on your eye lids? It’s frustrating, makes you look like you’re always tired and it makes you feel old. So what do you do?

Ok, first are you really getting enough sleep? Second, is it just dark circles or have you got a matched set of luggage going as well?

If you got a carry-on hanging out under each eye, start each morning with a cold compress over your eyes. You can make a cold compress by using Mint Tea Bags dampened with chilled water and held over your eyes for 10 minutes. This will shrink the capillaries in your skin and reduce the swelling.

Another option to reduce swelling is by taking dry spoons frozen for an hour and cupped over your eyes for 5 minutes (DO NOT use wet spoons frozen or you will lose your eye lashes!!).

Third option is using a dab of Preparation H under your eyes for 15 minutes (Caution this is a medicated product and should not be used if you suffer from Thyroid issues/disease). All of these will work wonders for your eye luggage.

As for the dark circles for a quick fix you want to use a good orange color corrector. My preferred brand choice is the Dark Circle Concealor by NYX Cosmetics, Medium. It runs about $6 over the counter and works wonders. This shade works for most skin colors if applied sparingly.

A small note here, Color Correctors are NOT concealers. They are not supposed to be applied heavily, their purpose is to neutralize the undertone of your dark circles so when you do apply your foundation and concealer the bluish/bruised tone of the dark circles will not bleed through giving your eyes a dark/bruised appearance.

There are many shades of color correctors out there, but for dark circles you want orange. Why? Because Orange is opposite of Blue on the color wheel and basically colors that are directly across from each other on the color wheel will neutralize each other.

To apply you can use your finger tips and apply lightly and blend out, or use a small concealer brush and apply lightly with gentle sweeping motions that move down and away from your eye.

Now after you’ve applied you color corrector lightly and well blended you can go ahead and apply your concealer as usual. Now, should you still feel that you are a little dark under the eyes you can choose to use a concealer about a ½ shade lighter than your skin, this will help further brighten your under eye. But I should note that too light of a shade can make you look like a reverse raccoon so use your discretion.

Using the tips of your fingers lightly dab this on. You don’t have to do it heavy and completely get rid of every trace of shadow you got going on. It’s just one step to the whole process.

Second, apply your liquid foundation over your whole face and under your eyes and over your eye lids like you normally would. Apply your powder, being careful to apply underneath your eyes, this will give a smoothness and help cover up the last vestiges of under eye shadow.

This four step process should remove any trace of dark shadows. Remember, it’s a building up process so you don’t have to be heavy handed with your products as this will just make you look like you are wearing a mask. So take your time, build up each layer carefully and blend out well and you will be dark circle free!

Method Makeup Academy, Sacramento’s Makeup School
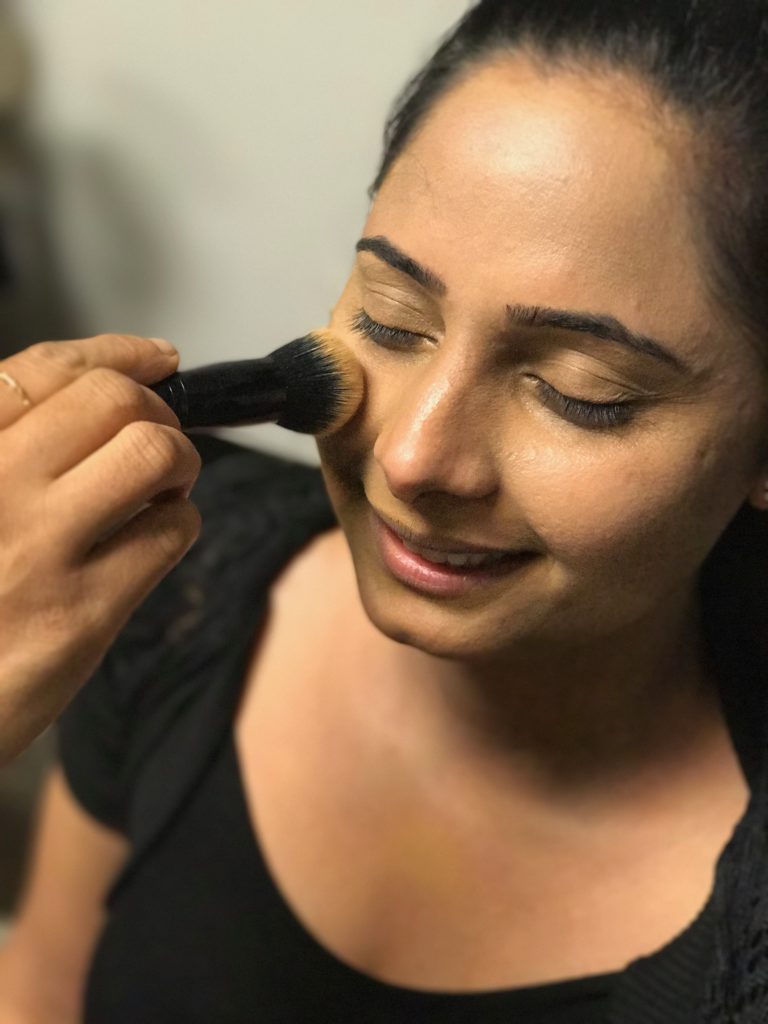
An Apple A Day

Tired of the morning lag?  Tired of downing cups of coffee, which, in spite of it’s great taste, has some rather unpleasant side effects?  First, it can make you jittery and wired, can give you a gross crash when it wears off.  It is very addicting, ask any coffee drinker what happens on the morning they skip their daily dose.  Headaches that will make you want to weep!

So what is our alternative for the caffeine junky in us all?

Well you know the old adage “An apple a day keeps the Doctor away”?  Well eat an apple a day and say good bye to coffee!

The natural sugars in the apple with give you a healthy boost of energy with out the addicting side effects of coffee.  There is no fast acting sugar rush, since in the process of eating the apple the fructose (natural simple sugar) is introduced to your blood stream at a nice even pace.  No nasty sugar rush like candy or even like coffee can.

So, no addiction, no nasty let down once the initial caffeine rush is over and best of all, no nasty yellow teeth!

Method Makeup Academy, Sacramento’s Makeup School

10 Quick Tips for Better Makeup

  1. Use waterproof mascara.  It won’t smear or run beneath your eyes by the end of the day like most regular, non-waterproof mascara will.
  2. Lipstick with a blue/cool undertone will make your teeth appear whiter.  Blue counter-acts yellow and will give the illusion of brighter, whiter teeth. There are of course some provisos on this, if you have very warm toned skin, a blue toned lip color could look ‘off’.  So, here’s what you want to do:  Use a warm tone lip color on the outer part of your lips, this will blend and compliment your warm skin tone, then on the inner part of your lips nearest to your teeth, use a cool toned lip color.  This is going to make your teeth look whiter. Also, using this tone variation can give you plumper, fuller looking lips.
  3. Set your foundation with powder.  Powder over your foundation will help it stay all day.  It will absorb the natural oils and moisture in your skin prolonging the wear of your makeup. Now, don’t just fluff it on, set it by pressing it gently into your skin.  Make sure that your foundation is blended well into your skin, as too much moisture will make the powder look thick and cakey. No matter how good of a setting spray you have, nothing out performs setting powder for all day wear.
  4. Light before dark.  Apply your light shadows first, then the dark, as this will keep the light shades from getting muddy while you blend.
  5. Lift your Brow.  When applying your eye liner, lift up your eyebrow to get a flat line.  Doing so will tighten up the skin on your lid for smooth application without any “skips”.
  6. Clean your brushes.  Clean brushes will apply your makeup more quickly and cleanly.  A clean brush will also keep your colors bright and true.  So wash your personal brushes at least once a month. (Also, ew!  Who wants dirty brushes?  All those ugly bacteria running around…..)
  7. Don’t Powder your eyelids.  Leaving your eyelids moist from your liquid foundation or cream concealer will make your eye shadows wear longer.  The moisture will “grab” the shadow and make it stay.
  8. Use blush LIGHTLY.  Blush adds healthy color to a face, giving the impression of youth, life and health, but it is NOT a contour!  It should be applied lightly onto the apples of your cheeks (Where the actual cheek bone is) and not beneath the cheek bone where your contour goes.
  9. Blend.  Blend, blend, blend your eye shadows.  Un-blended shadows can leave hard lines and make your eye shadow appear unfinished. Blending your colors leaves a beautiful gradation which gives a finished, polished look.
  10. Do your eyebrows.  Even if you have naturally dark brows, adding a little bit of powder or pencil to them will help define and finish off your face. Choose a shade 1-2 shades lighter than your head hair and use lightly just to add conformity to your brows.

Method Makeup Academy, Sacramento’s Makeup School

How To: The Perfect Smokey Eye

What you need:

  • Matte Black Eye Shadow – Whichever brand you prefer. I’m partial to Morphe for most of my shadow palettes, but that’s just me. MAC has a VERY black shadow as well. (Whichever you choose, try for a TRUE black, none of that blue-ish tinted crap you find in some brands. If you don’t have a TRUE black and your black shadow is slightly blue-ish in tone don’t panic. You can make your black appear TRUE with a quick trick.)

*** The Trick: Simply put a NEUTRAL brown (slightly gray tinted brown) down first before you apply your black eye shadow. This will keep the black looking BLACK and not pull a weird blue undertone. ***

  • Matte Charcoal Gray Eye Shadow.
  • Matte Nude/Cream/Soft Tan Shadow – Choose a skin tone shade that matches your own, but is about 3 shades lighter. You don’t want a STARK white or too pale shadow, though you want a color that will add some nice contrast.
  • Shimmer Nude/Cream/Soft Tan Shadow – This should be the same color as your brow bone color, just in a shimmer form. This will be for your brow pop to add some size and make your eyes look bigger.
  • Black Eye Liner – I prefer gel liner (Maybelline New York Eye Studio Lasting Drama Gel Liner, Blackest Black), as I can get a sharp line or a good smudgy/smoky line. You can choose a pencil/kohl liner or whichever your favorite is, though I would advise against liquid as it might dry too fast and be a more messy product to try to smoke out.
  • Mascara – It’s up to you which you prefer.
  • Flat Eye Shadow Brush – for packing
  • Medium Firm Blending Shadow Brush – for your crease blend

The How To:

  1. Apply the matte light colored shadow over the brow bone, using the flat eye shadow brush to pack it in place underneath your eyebrow.
  2. Using the flat eye shadow brush use the shimmer light color and set it just beneath the height of your arch in your brow. Keep this as a small and well blended light catch.
  3. Use the medium-sized blending brush with the Charcoal Gray Eye shadow, apply over the entire lid and blend well into the crease until the final edge is softened very lighly up onto the brow bone. Be sure to leave some space between the finished edge of the Charcoal Gray and your eyebrow which will help with the illusion of size for your eye and not let the darkness of this look make your eye appear smaller.
  4. Using the Black shadow and the medium blending brush, apply the back to your lid. Remove the excess powder from your brush, before using the black shadow you placed on the lid to blend up into your crease, letting it finish into the Charcoal Gray to create a beautiful smoking effect.
  5. Using an angled liner brush apply the Gel Eye liner/Or Pencil Liner to the upper lid. Using a cotton swab or a clean small shadow brush, you can then soften the liner out to smoke into the eye shadow. This will create a perfect smoking effect from very black at the lash line, smoking out to a softer black of the shadow and finally finishing into the charcoal gray.
  6. Holding the wand horizontally, apply mascara from underneath the upper lashes, working from the base of the lashes to the tips. Apply evenly from the tear duct to the outer corner.
  7. Re-load the wand and apply mascara to the lower lashes, working from the base to the tips. If thicker lashes are desired, apply a second coat of mascara.
  8. The smokey eye requires a stronger brow then a more natural eye. Using an angled brush, use a shadow that is the same tone as your hair, choosing a color that is one shade lighter than your hair. Using the angled brush start filling in your brow with small upward, hairlike flicks, working your way towards your arch. At the arch continue filling in the brow using longer more fluid motions down the length of the brow’s tail.

And there you have it!  A true smokey eye. (Note of Caution:  Not ALL eyes look good with a Smokey eye, not ALL people can pull off a solid black.  If you think that might be you, choose a dark brown as base crease and then softly blend in some black.)

Method Makeup, Sacramento’s Makeup School

Blemish Control for Male Clients for Film/TV & Weddings

Image by Thomas Ulrich from Pixabay

Male makeup comes in may levels and degrees, you have the shine control that you see for most interviews and corporate headshots, the minimal coverage and “natural” makeup you find on film and every step that increases to full face.

Below are a few tips for doing male blemish control for TV/Film and additional tips for Grooms on their big day.

Blemish Control for TV:

Oil control and shine control is the main concern for this type of makeup. The client is do be fully mattified with very, very minimal coverage of makeup to ensure the most natural of appearances. Products used are very lightly applied and the main focus is the reduction of shine. If you have time to do a more thorough application, use the following steps:

Mattify and cleanse with Micellar water and a cotton swab. Let fully dry

Add Mehron Skin Prep Pro, or other such facial antiperspirant to hair line and t-zone. Allow to fully dry.

Apply a light moisturizer as needed to any dry zones on the client’s face/.

Prime very lightly if needed with a mattifying primer over any enlarged pores. Apply with sponge and allow to dry.

For undereye circles, eyelid pigmentation and any other pigmentation blemishes use RCMA cream foundation and apply very lightly with a sponge, fingertips for a firm small domed blender. Buff away all excessive product to avoid any risk of creasing under the stage lights.

Set entire face with RCMA Translucent Setting Powder or Ben Nye Colorless Setting Powder, these are your best options for film and will avoid any ashy appearance on camera. Set well then buff away all excessive powder with a dry domed blender to remove any risk of causing an ashy effect on camera.

Last but not least tame that facial hair using a mascara spoolie and if needed a spritz of hairspray on the spoolie.

Now, if you don’t have time for any of that do these five steps:

Drape your client

Moisturize under eyes and any dry patches.

Conceal very lightly under eyes and over lids, buff excess off thoroughly.

Set entire face well with setting powder, buff excess off thoroughly.

Groom facial hair.

Now for our lovely grooms. They take a little more TLC and you will certainly have more time to pamper them on their special day. You still want to keep a light hand; however, the lighting and type of photography will allow a little more product if needed.

Mattify hairline and t-zone with Mehron Skin Prep Pro

Moisturize under eyes and any dry patches

Apply lip balm and let set. That first kiss should be a pleasant experience for both parties!

Apply color correction to any blemishes as needed. Buff excess off thoroughly before apply a very light layer of concealer under eyes and on lids and any where else you might need a very, very slight evening out of tone.

Set thoroughly with Ben Nye Colorless setting powder (darker tones for clients of darker skin tones) and buff off excess thoroughly.

Groom facial hair, spraying as needed to control brows and beards.

Additional options your client may benefit from and appreciate:

A touch of very soft brown liner to top lash line

A touch of brown mascara. Once you apply a single coat take a clean wand and brush out the lashes thoroughly so that they are only very slightly tinted.

A touch of brow mascara, very lightly applied and very thoroughly brushes out just to leave a slight tint to the hairs.

And there you have it, some tips on Male Blemish Control Makeup.

Method Makeup Academy, Sacramento’s Makeup School

Learn what they don’t teach in Beauty School

Learn everything about makeup they didn’t teach you in beauty school!

In 2007 Method Makeup began our very first makeup workshops. They started simply enough, a single day Smokey Eye class for local cosmetologists to teach the latest trend. That single class was the catalyst for our whole program for one simple reason, these licensed Estis and Cosmos didn’t know the basics of color matching or shadow contouring for various eye shapes. What they had learned in beauty school had allowed them to pass the State Board, yet it left them with no real-world skills to offer their clients. In the last 16 years not much has changed in what the cosmetology schools teach, even the best programs can’t go into the specialized and detailed training required to create a skilled makeup artist. They’re job is to prepare their students to pass the State Board to become licensed, leaving their graduates with a basic understanding, yet no true knowledge of how to work with clients of all ages, skin colors and skin types. These students are able to pass the written and practical tests where sanitation is the focus, yet when faced with clients they don’t have a clear understanding of color matching, of undertone, of facial structure and proper shadow placement for every eye shape.

That’s why Method Makeup was created, to bring these foundational techniques to our students, to help them become truly professional makeup artists. Artists who can work on any skin color, handle any skin type, face shape and eye shape. Our Pro Class teaches all the necessary skills, including business development, so you can begin your career as a Professional Makeup Artist with all the skills of a true Pro.

Method Makeup Academy, Sacramento’s Makeup School

Planning the Perfect Wedding

https://www.legacyunion.com/

We’re so happy to hear your big news!

Have you started your wedding planning?

If not, then we are glad to help you out.

What to Prepare For Your Wedding

We know that you’re not the only one who has been waiting for this day to come. And now that it’s finally happening, your emotions may be overwhelming.

It’s normal to feel excited and overjoyed just by thinking about your wedding day. But that’s not the only thing that you will feel as your big day approaches. You may also feel a lot of stress and anxiety. But we can’t let those negative emotions take over, do we?

So to help calm your nerves, we are here to help you plan your wedding by providing you a list of things you need to consider for your big event.

Set Your Budget

The first thing you will always have to consider when planning for your wedding is the budget.

Always set your budget first before proceeding to look for the other essentials for your wedding day. If you have set a budget, you will know the limitations of the things you need to have for your wedding.

Your budget will determine the rest of your wedding plans and processes.

Set Your Date

Now that you and your partner have finally set the budget for your wedding plans, it’s time to pick a date for your wedding.

A lot of people get married everyday so setting the date and sending out a save the date early would assure you that you have no competition on that certain day.

After all, it only happens once in our lifetime so it’d better be memorable.

Setting the date for your wedding can also help you get started with setting the direction of your plans.

Pick Your Venue

Now that things are slowly coming together, it’s time for you to choose a venue for your big day.

We understand that there are thousands of beautiful locations to choose from. We highly recommend you choose a place that you are truly in love with.

Your wedding day only happens once so it’s best to pick a venue that is memorable for you and your husband.

It can also set the mood from good to fantastic.

Guest List

Although you can still change your guest list sometime later, it’s still best to start with it earlier so you will know the guest limit for your wedding. The amount of guests you are able to invite often depends on your budget and venue.

Starting a guest list can also help you adjust the venue for your wedding day and also the amount of food to be served.

Theme

Most weddings don’t have a specific theme, but having a themed can be fun and super stylish. Setting up a theme can also make it easier for you to choose the designs and the wardrobe choices for you, your partner, and even for your guests.

Choose Your Outfit

Never rush with this one.

Take your time and pick up a wedding gown and outfit that is perfect for you. Remember that your wedding day should be memorable and happy.

So if you want everyone to remember you, make sure to wear a gown that would look truly remarkable on you.

Plan your Hair and Makeup

Even though your hair and makeup will be done on the day of your wedding, planning it ahead of time can give you room to choose the perfect makeup artist and look.

This is the big day we are talking about and you should make sure that your makeup looks good on you so you can show off the best version of yourself.

Planning your wedding can be exhausting but it can also bring you lots of fun and excitement, especially if you have a wedding checklist with you. You can contact Method Makeup Academy if you want to learn more about makeup and making yourself look gorgeous for your wedding day. And if you want to work with a professional wedding photographer or videographer, you can contact Legacy Union Photo Co for the best wedding photography & videography services in Southern California.

Method Makeup Academy, Sacramento’s Makeup School

The Truth About Suicide, Self-Care and Mental Illness

Image by María Prieto from Pixabay

Suicide is a scary topic. The thought of anyone taking their own life is upsetting, and losing a loved one to suicide is completely devastating. But treating suicide and mental illness like taboo topics makes it more difficult for people to get the help that could save their life. If you are concerned for your own or someone else’s emotional well-being, here are some ideas to get a healthy conversation started, brought to you by Method Makeup Academy.

Mental Illness Is More Common than You Think

If we want to properly treat depression, anxiety, and other mental illnesses that lead to suicide, we have to start by openly acknowledging them. Thousands of suicide victims have struggled with some form of mental illness. Often, battling with a mental health disorder leaves individuals feeling isolated and ostracized from society, but in reality, mental illness is surprisingly common. In fact, the National Institute of Mental Health reports that about one in five American adults has some form of mental health disorder, but the actual percentage is likely much higher since many sufferers haven’t received a diagnosis. We all struggle with our emotional health from time to time, so don’t let your thoughts or feelings keep you from reaching out for help that could save your life.

Mental Health Care Has Evolved

If you’re worried that seeking help for yourself or a loved one will involve a frightening hospital stay or hours on a couch, you shouldn’t be. Mental health treatments have changed over the past few decades to include more holistic, less harsh forms of care, and there are more specialists than ever who have dedicated their lives to helping those fighting their way through dark times. A care team, which may consist of one or more of a few different specialists, can help you find your way back to health.

Whatever specialists you choose to work with, you will undoubtedly take part in some mode of therapy. Therapy can take a variety of forms and can help you sort through some of the confusing emotions you are feeling. As part of your treatment, your provider may indeed recommend a stay in an inpatient program, but there are plenty of mental healthcare facilities that address concerns without feeling overly sterile or strange. So, don’t be afraid to seek out the support that you need. Taking that first step for help is often the hardest part. 

Self-Care Can Help Prevent Thoughts of Suicide

Depression and other emotional health issues can make necessary self-care seem like a burden. Simple tasks like keeping up with hygiene and preparing food can feel impossible, but sticking to routines that keep you healthy and calm can be a sort of remedy for your mental health. You have to take care of yourself to keep your strength up. Set aside a room in your home that is solely dedicated to mental health-related activities, like meditating and practicing yoga. Try to wake up and take the first few minutes of your day for a soothing activity, and end your day on a relaxing note as well. Whenever possible, try to work some exercise into your day; use a smartwatch to help track your activity and keep you motivated. ZenBusiness also suggests tapping into stress management techniques like focused breathing, accepting stress for what it is, avoiding stress-inducing people and even identifying your stress triggers.

Eat mood-boosting foods such as eggs, wild salmon, asparagus, and nuts. It’s also important to avoid self-medicating with drugs and alcohol. There is a direct connection between substance abuse and suicide, so if you or someone you know is struggling with addiction, it’s critical to seek help immediately.

Suicide Warning Signs Are Often Subtle

Some signs that a person is contemplating suicide are apparent. Talking about suicide, inflicting harm on oneself, or writing about death are clear signs of suicidal thoughts. Often, however, suicidal markers are a little harder to detect. If you or someone close to you struggles with depression and has a sudden change in behavior, take notice. Suicidal individuals may begin to withdraw from relationships. They may have sudden fits of rage at the simplest of stressors. Sometimes, they will begin to give prized possessions away. If you notice any of these behaviors in yourself or someone you know, ask important questions so you can get help. When those signs seem close to turning into action, don’t be afraid to call for emergency assistance.

As a society, we need to stop ignoring the signs of suicide and mental illness. Educating ourselves about the importance of emotional well-being and the benefits of mental health care makes us stronger as a community. We have to support our friends, family members, and ourselves when we are at our darkest moments. Caring can be enough to make a real difference in the well-being and happiness in our communities. It may even be enough to save a life.

Method Makeup Academy, Sacramento’s Makeup School