Category Archives: Uncategorized

Halloween

Halloween is a day that gets mixed reviews.  Its a day when some believe the spirits roam the earth, a day for fun and frolic and for some, fear.  Whatever your personal belief there is definitely something about this one day of the year that intrigues and inspires the world.

Its true that this day was once celebrated in ancient times, a pagan holiday filled with mystery and fire.  A day that the early Christians feared for its power and the darkness that seemed so close at hand during this time of year when the sun begins to wane.  But today, even so many years later, this holiday has survived, taking on a new and glamorous face, that barely hides its ancient origins.  What is it about Halloween that fascinates and thrills the world?  That thrills young and old alike?  Why do we like Halloween?  Because we get to reinvent ourselves, re-imagine who we are, unleash our alter ego and revisit our childhood.  We get to be whomever we want to be.

So light the fires, break out the paint and be whomever you want to be this year.  For one day, you are free to be…you.

Method Makeup Academy, Sacramento’s Makeup School

How to Use Loose Pigments

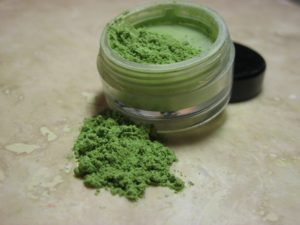
So, you’ve finally decided to try loose pigments, the rainbow of bright colors have cast their siren song over you and you finally bought them.  Now there you stand in front of your mirror with those pretty colors and have no idea how to use them!

Don’t worry, you are not alone.  Pigments can be very frustrating, but they are so worth learning how to master.  No other piece of makeup can give you those brilliant shades that sparkle and flash that pigments can.  So, don’t get discouraged, we’re here to help you learn how to use all those amazing pigments.

First, you need to have a few essential items.  I recommend using MAC’s Cream Colour Base Luna.  This versatile and multi-purpose, Cream Colour Base can be applied directly to bare skin, or layered over foundation, moisturizer, or powder.

Apply it to your lid prior to your pigment.  This creates a smooth and light colored base with some moisture.  The pigments will cling to the moisture in the base and the light color of Luna will make the color in the pigment really pop.

Second, your application is important.  First apply your foundation, powder, etc, as you normally would.  Second, apply a heavy layer of translucent loose powder beneath your eye.  This will keep the pigment from sticking to your cheeks and discoloring under your eye.

Pigment is loose powder and it is going to fall down onto your cheeks, so the extra layer of loose powder under your eyes will catch the pigment that falls and all you have to do at the end of your shadow application is sweep it away with your powder brush!

So, now that you have your loose powder under your eye, take a flat shadow brush and apply Luna to your lid.  I suggest applying it from the lash line all the way up to your brow bone.  Now apply your highlight shadow.  I recommend using a normal matte shadow at this time, then switch over to your pigments.

Now, you can NOT really blend pigments, they will go everywhere!  And I do mean EVERYWHERE!  So instead, use a firm, flat shadow brush and pack the pigments over the lid in the pattern you desire.  Start with a little bit at a time, patting and fanning it out into the areas you want.  Once you have them over the areas desired you can go back over with more pigment and pack it into place. You can NOT blend pigments, you have to pack and feather them to get the right level of coverage.

The last thing I usually do when I am applying pigment is take a clean, dry, soft blending brush and very gently slid if over the lid.  This will soften the lines of the pigment and help blend the colors all together to give it a clean, finished look.

Well, there you have it.  Beautiful, fabulous eyes!  So get out there and rock that pigment!

Method Makeup Academy, Sacramento’s Makeup School

False Lash 411

False lashes are a fun addition to any makeup.  Here are just a few tips to help you get the long lashes you want and not an eye full of glue!

First, it’s important you have the right tools.  That means no cheapy plastic lashes, get real, 100% human hair false lashes with a nice small band.  This does not mean you need to spend a fortune on your lashes.

I don’t spend more than $2 per set!  Most the time not even that since I was turned onto the amazing www.ikatehouse.com! You can get amazing lashes by Miss Adoro, JLash, Crème, you name it.  Not to mention the iKate House brand lashes are darned good!  They are human hair, high quality, reusable and they offer a huge selection ranging from $1 and up. These brands are good quality, can be worn at least three more times and won’t break the bank.  I love MAC but I’m NOT willing to pay $10 or more for a set of lashes.

Next you need to have a pair of slant edge tweezers; these will help you place the lash to your lashes.

And strip lash glue, clear.  The best brand for lash glue in my opinion is Ardell.  It’s Cruelty Free, dries quickly and holds all day.  For those of you however who are Latex sensitive I would recommend the Kiss brand lash adhesive.  (Small warning though:  Kiss does NOT pull off easy like your usual lash adhesive.  So remove carefully with warm water or baby oil.)  Avoid black glue as this can show up more than the clear.

The last thing you will need for your lovely lashes is a pair of scissors.  You need scissors because one size does NOT fit all in the lash world.  Lashes are supposed to be cut to fit your eyes.

The way you would measure this is from slightly out of your tear duct.  Do NOT take it all the way to the inside of your eye, because this will make it lift and poke you in the nose.  Not fun.  Start them where your natural lashes start.  The small end of the false lash goes towards the inside of your eye, while the fuller end goes outward.  Trim off any excess lash that extends past where your own lashes end.  If you leave false lashes too long they will start to lift AND they will make your eyes look droopy.

Once you have all the tools and your lashes are trimmed you are ready to apply your lashes.

  1. Trim your false lashes to fit your eyes.  Each eye is unique so measure them separately.
  2. Do NOT apply mascara to your lashes.
  3. Apply a little bit of lash glue to the band.  Just a little bit is needed.  Let stand for a count of 30 before applying.
  4. Apply lashes from the inside towards the outside.  Apply to the lashes themselves NOT the skin.  Slid up your lashes until they touch the skin, but are NOT on the skin. (Remember, false lashes shouldn’t be applied to the lid, instead just at the edge of the lashes where the lid and your natural lashes meet.)
  5. Allow to dry with your eyes closed.
  6. Open your eyes, apply mascara from roots to tips, wiggling back and forth to blend your natural lashes with your false lashes.

And there you have it!  Beautiful lashes!

Method Makeup Academy, Sacramento’s Makeup School

Clean Face, Happy Face

It may seem silly, an article about how to properly clean your face.  I mean really?  Isn’t this something we learned when we were toddlers?  Well yes and no.

Yes we can keep the dirt off our face, but most of us don’t know the proper way to keep our skin from clogging with comedones or worse having acne!  God forbid!

So, here’s a few steps that will keep your skin clean and clear and looking amazing!

First there are the tools, of course.

One of the best face washes, the most bang for the buck has got to be Cedipil, and you can find it at Wal-Mart for under $10!  Get the one for Oily Skin; it works wonderful for all skin types, I kid you not, have yet to find anything better on the market.  It doesn’t lather, so don’t use too much try to get suds.  This is a real face wash and not body wash, no suds is a good thing.

You also want to have an exfoliant, a manual one, so no apricot scrubs or muds; I am talking a good manual cloth.  Wash clothes work, but the best thing you can get is a Japanese Wash Cloth.  You can find them at most oriental markets or even import stores like Cost Plus World Market.  You can also find them online I am sure.  If you can’t find one you can use a good old fashioned wash cloth or you can finally make use of that darned Kabuki Brush!  Yes, Kabuki brushes can be used as exfoliators.  Strange huh?

Ok, now for the steps:

  1. Pre-wet your face with warm or hot water.  This opens up the pores so the exfoliant and wash can work.
  2. Apply face wash directly to your skin.  Do not put on your washcloth/Kabuki Brush, as this will waste product.
  3. Vigorously exfoliate, this does not mean taking skin off, this just means a nice healthy scrub that will get all the makeup/oils/etc. off.
  4. Then rinse your face thoroughly with warm water.  Then one last rinse with cold.  The cold water will now close your pores so that nothing gets back into them now that they are all cleaned out.

When you are wearing makeup, you may wish to wash your face twice.  If using liquid foundation three times is even better to make sure all of skin is cleaned.

Well there you have it.  The proper way to wash your face!

Method Makeup Academy, Sacramento’s Makeup School

The Best Makeup to buy on a Drug Store Budget

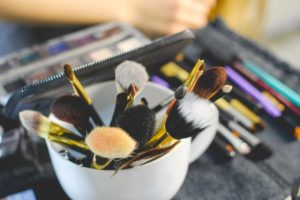
Not all good makeup is expensive makeup.  Some of the best products out there can be found at your local drug store.  It’s true some pieces are worth the extra cost, but why pay more when the best items are right there under your nose?

  1. Mascara – NYX Cosmetics Doll Eye Mascara. This mascara is great, fully waterproof, with a non-goopy formula that lengthens and defines your lashes.  NYX is a professional brand originally started in LA for the film industry (It’s still used for many films) but they have now branched out into the retail world.  The best part of NYX is the price.  You get high grade Professional makeup at drug store prices.  NYX is found at most Targets.
  2. Liners – Believe it or not, the best, longest lasting black liquid liner is by Wet N Wild. Their H2O Liquid liners are fully waterproof and believe me when I tell you they will stain!!! They work amazing.
  3. Foundation – Revlon Color Stay.  About $13 at Rite Aid or Walmart, but can be found on sale at Rite Aid from time to time for the wonderful Buy 1 get 1 half off deal.  Seriously best coverage out there. In the 13 years that I’ve been doing professional makeup I keep finding myself drawn back to Revlon. I just can’t find a brand I like more regardless of the price tag.
  4. Eyeshadow – NYX Shadows are heavy on the pigment and wear all day.  These shadows rock!
  5. Primer – Hands down the Poreless Primer by ELF Cosmetics. ELF started out a few years back as a cheapy brand, but now they offer some really amazing products, including this amazing primer that works well on almost all skin types. They have a really nice selection of primers of all kinds, but the Poreless is definitely my favorite.  You can find most ELF products at Walmart.
  6. Brushes – I love, love, LOVE the black pro brushes by ELF Cosmetics, most of which can be found at Walmart. My favorite though has got to be the Selfie Ready Blurring Brush, which is a must for light weight liquid foundation application. I love this brush and for $6 you can’t go wrong! And the rest of ELF’s black pro brushes are darned good too!
  7. Lips – Got to say I’m a fan of ELF again for lips. They have a nice creamy texture, a good variety of colors and a great price tag. They wear pretty well. Definitely worth playing around with.
  8. Color Correctors – You’ve got to try the LA Girl Pro Conceal High Definition Concealer Green, Orange and Yellow. Mix these concentrated liquid correctors into your concealer and you’ll be able to vanish any blemish. These are also found at Walmart.
  9. Gel Eye Liner – Maybelline New York Lasting Drama by Eyestudio, very creamy and wears well without smearing. Waterproof and smudge proof.
  10. Brows – ELF Cosmetics Eyebrow Kit. This handy duo comes with a wax and a powder shadow to help fill in and shape your brows. Offered in three shades, Light, Medium and Dark.  Work excellent with the small angled brush that comes in it or with a brow brush of your choosing.  Like all ELF products you can pick this up at Walmart as well.

These 10 items are a must for any makeup kit both personally and professionally.  And best of all none of them will break the bank!

Method Makeup Academy, Sacramento’s Makeup School


Different Uses for your Makeup

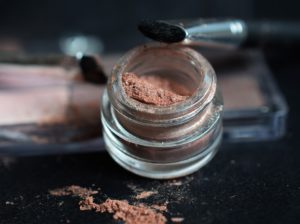
I think the coolest thing about makeup is the freedom it gives us to get creative.  It allows us to change our moods just by the application of some lipstick or a different shade of shadow.  I also love how flexible makeup itself is.  Each item can be used for multiple things, which makes it great in this day and age when budget is a big factor in what we get to buy.

So, you want to get creative and get the most out of the makeup you have?  Here’s a few ways to make your makeup work for you.

Eyeshadow:  So many uses!  You have no idea.  You can use eye shadow for so many things.  One small compact of shadow could work as you blush, you contour, your highlight, your eye shadow (of course), your eyebrows, you eye liner and you can even use it to color your lips!  It’s crazy how versatile a good eye shadow can be.

Personally I use my black NYX eye shadow to fill in my eyebrows, to darken my lid and blend out my crease and to line my eyes.  How easy is that?  One shadow to do three jobs?  Talk about being able to pack light!

Lipstick:  This can be used as a cream eye shadow, a cream blush and even a cream contour or highlighter depending on the shade.  An orange Lip Stick can even be used to neutralize those dark circles.

You can use lip liner for eye liner, eye liner for brow pencil and you can use mascara on your eyebrows to fill them in if you have the right shade!

There are so many uses for each individual piece of makeup that the possibilities of the looks you can create are endless.  So if you’re looking to change up your look but you lack the funds to try out a new eye liner to give yourself that awesome pinup liner, try your black eye shadow.  Dampen it with some contact solution and just paint it on like a liquid liner.  It will give you that sharp defined line and best of all dry into a powder so it won’t melt or smudge away.

Go on, try something new with your makeup.  See what other uses you can come up with.  I dare you!

Method Makeup Academy, Sacramento’s Makeup School

Brush Cleaner Basics

One question everyone seems to ask is: What kind of Brush Cleaner should I use for my makeup brushes?  It’s a legitimate question.  I mean you could spend a fortune trying all the ones out there on the market.

There are definitely good cleaners out there on the market, cleaners that will remove the makeup, sanitize and condition your brushes without ruining them.  But then there are others that have a high level of Isopropyl Alcohol in them which can ruin any brush by drying out the cuticles and causing them to fray.

MAC Cosmetics has a decent one, though it doesn’t dry as quickly as they promise and even Sephora’s Daily Brush Cleaner is good.  But if I had to choose one out of all of them it would be Cinema Secrets Professional Brush Cleaner.  It’s blue and smells like yellow cake, breaks down makeup & oils like magic and conditions your brushes at the same time.  Simply love this stuff!

None of these brushes however are quick dry, so use sparingly when cleaning your brushes on the job.

Now, if you are on a tight budget and even $13 (Cinema Secrets Professional Brush Cleaner 4oz Bottle is $13) seems like a little too much to spend, you can get your brushes sparkly clean and conditioned for pennies with a little product I like to call Dawn Dish Soap.

Yes, you heard me right!  Dawn Dish Soap is a miracle cleaner.  Its gentle formula will quickly break down the oils in the brush without stripping them and ruining them.  Works great with synthetic as well as natural hair brushes.

If you’re using the Dawn Dish Soap method you can give your natural hair brushes a nice deep conditioning treatment by using your hair conditioner.  I know, sounds funny to hear me telling you to use dish soap and hair conditioner but it’s true.  They work great for those of us on a more restrained budget.

Well I hope this gives you some food for thought and an idea of what you should be using to clean your makeup brushes.

Method Makeup Academy, Sacramento’s Makeup School

Blush

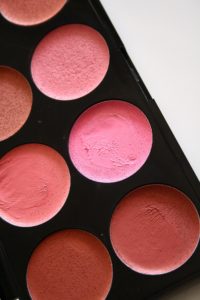
So, the questions are, how much, where & what color.  Yep, that pretty much describes how most of us feel about blush.  Well, here’s a few pointers that might help.

  1. Blush is pink or peachy.  Bronzers are not blush, though they can definitely be used as blush if you like that bronzy look.
  2. Choose a blush that matches your undertone. Which means if you have a warmer more yellow undertone choose a more peachy blush.  If you have a cool, bright pinky undertone, choose a true pink with a blue undertone.
  3. Blush should be applied in a lazy J motion.  This means the heaviest part will be on the apples of your cheeks with a sweeping motion back along the actual cheek bone to the hair line.  I call this the Nike Swoosh movement if that better illustrates what I mean.
  4. Blush goes on the curve of the cheek bone, NOT under it and NOT above it.
  5. Don’t be shy.  Blush adds life and a healthy youthful glow to your face.

So, we all hope this helps!  Have fun!

Method Makeup Academy, Sacramento’s Makeup School


Avoid the Blue in Black

Does your black eye shadow always seem to look gray or worse blue-ish on you every time you apply it?  You love that smoky eyed look that everyone else seems to always be able to rock, but the black is just not your friend?

You’ve tried every brand, from MAC to Maybelline and still you can’t get your black to stay black.

Well, here’s two tricks that’ll keep your black as dark as you want it to be.

Option One:  This one costs money so if you are on a tight budget like the rest of us, skip ahead to Option Two.  Now, because I know you are still reading this, here’s the first tip.  You can purchase a good cream eye shadow of a light or nude tone.  Apply this to your whole lid, then apply the black eye shadow.  The lighter color should help the black to really pop.  But, if you’re budget demands you save your pennies and dimes, or you’re tired of buying yet another piece of makeup, try:

Option Two:  This one is simple, easy and works every time.  Apply your highlighter as you normally would, then wherever you plan to apply the black eye shadow, lightly apply a neutral medium to light brown.  Then pack your black shadow over the brown and blend out.  The soft neutral brown will cancel out any affect the black eye shadow has on your skin tone and will keep the black true, dark and fabulous to smoke out and get a sexy cat eye.

Now you have no reason to be afraid of black, get out there, grab your brushes and have fun!

Method Makeup Academy, Sacramento’s Makeup School


The Dark Circle Fix

So, you’re getting enough sleep and still you have dark circles under your eyes and on your eye lids? It’s frustrating, makes you look like you’re always tired and it makes you feel old. So what do you do?

Ok, first are you really getting enough sleep? Second, is it just dark circles or have you got a matched set of luggage going as well?

If you got a carry-on hanging out under each eye, start each morning with a cold compress over your eyes. You can make a cold compress by using Mint Tea Bags dampened with chilled water and held over your eyes for 10 minutes. This will shrink the capillaries in your skin and reduce the swelling.

Another option to reduce swelling is by taking dry spoons frozen for an hour and cupped over your eyes for 5 minutes (DO NOT use wet spoons frozen or you will lose your eye lashes!!).

Third option is using a dab of Preparation H under your eyes for 15 minutes (Caution this is a medicated product and should not be used if you suffer from Thyroid issues/disease). All of these will work wonders for your eye luggage.

As for the dark circles for a quick fix you want to use a good orange color corrector. My preferred brand choice is the Dark Circle Concealor by NYX Cosmetics, Medium. It runs about $6 over the counter and works wonders. This shade works for most skin colors if applied sparingly.

A small note here, Color Correctors are NOT concealers. They are not supposed to be applied heavily, their purpose is to neutralize the undertone of your dark circles so when you do apply your foundation and concealer the bluish/bruised tone of the dark circles will not bleed through giving your eyes a dark/bruised appearance.

There are many shades of color correctors out there, but for dark circles you want orange. Why? Because Orange is opposite of Blue on the color wheel and basically colors that are directly across from each other on the color wheel will neutralize each other.

To apply you can use your finger tips and apply lightly and blend out, or use a small concealer brush and apply lightly with gentle sweeping motions that move down and away from your eye.

Now after you’ve applied you color corrector lightly and well blended you can go ahead and apply your concealer as usual. Now, should you still feel that you are a little dark under the eyes you can choose to use a concealer about a ½ shade lighter than your skin, this will help further brighten your under eye. But I should note that too light of a shade can make you look like a reverse raccoon so use your discretion.

Using the tips of your fingers lightly dab this on. You don’t have to do it heavy and completely get rid of every trace of shadow you got going on. It’s just one step to the whole process.

Second, apply your liquid foundation over your whole face and under your eyes and over your eye lids like you normally would. Apply your powder, being careful to apply underneath your eyes, this will give a smoothness and help cover up the last vestiges of under eye shadow.

This four step process should remove any trace of dark shadows. Remember, it’s a building up process so you don’t have to be heavy handed with your products as this will just make you look like you are wearing a mask. So take your time, build up each layer carefully and blend out well and you will be dark circle free!

Method Makeup Academy, Sacramento’s Makeup School