
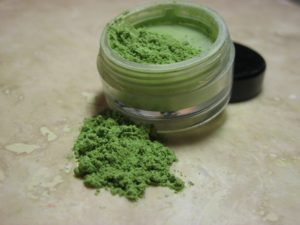
 So, you’ve finally decided to try loose pigments, the rainbow of bright colors have cast their siren song over you and you finally bought them. Now there you stand in front of your mirror with those pretty colors and have no idea how to use them!
Don’t worry, you are not alone. Pigments can be very frustrating, but they are so worth learning how to master. No other piece of makeup can give you those brilliant shades that sparkle and flash that pigments can. So, don’t get discouraged, we’re here to help you learn how to use all those amazing pigments.
First, you need to have a few essential items. I recommend using MAC’s Cream Colour Base Luna. This versatile and multi-purpose, Cream Colour Base can be applied directly to bare skin, or layered over foundation, moisturizer, or powder.
Apply it to your lid prior to your pigment. This creates a smooth and light colored base with some moisture. The pigments will cling to the moisture in the base and the light color of Luna will make the color in the pigment really pop.
Second, your application is important. First apply your foundation, powder, etc, as you normally would. Second, apply a heavy layer of translucent loose powder beneath your eye. This will keep the pigment from sticking to your cheeks and discoloring under your eye.
Pigment is loose powder and it is going to fall down onto your cheeks, so the extra layer of loose powder under your eyes will catch the pigment that falls and all you have to do at the end of your shadow application is sweep it away with your powder brush!
So, now that you have your loose powder under your eye, take a flat shadow brush and apply Luna to your lid. I suggest applying it from the lash line all the way up to your brow bone. Now apply your highlight shadow. I recommend using a normal matte shadow at this time, then switch over to your pigments.
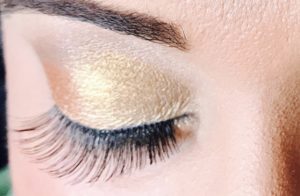
Now, you can NOT really blend pigments, they will go everywhere! And I do mean EVERYWHERE! So instead, use a firm, flat shadow brush and pack the pigments over the lid in the pattern you desire. Start with a little bit at a time, patting and fanning it out into the areas you want. Once you have them over the areas desired you can go back over with more pigment and pack it into place. You can NOT blend pigments, you have to pack and feather them to get the right level of coverage.
The last thing I usually do when I am applying pigment is take a clean, dry, soft blending brush and very gently slid if over the lid. This will soften the lines of the pigment and help blend the colors all together to give it a clean, finished look.
Well, there you have it. Beautiful, fabulous eyes! So get out there and rock that pigment!
Method Makeup Academy, Sacramento’s Makeup School
 False lashes are a fun addition to any makeup. Here are just a few tips to help you get the long lashes you want and not an eye full of glue!
 It may seem silly, an article about how to properly clean your face. I mean really? Isn’t this something we learned when we were toddlers? Well yes and no.
 Not all good makeup is expensive makeup. Some of the best products out there can be found at your local drug store. It’s true some pieces are worth the extra cost, but why pay more when the best items are right there under your nose?
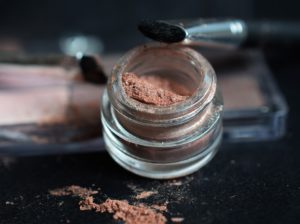 I think the coolest thing about makeup is the freedom it gives us to get creative. It allows us to change our moods just by the application of some lipstick or a different shade of shadow. I also love how flexible makeup itself is. Each item can be used for multiple things, which makes it great in this day and age when budget is a big factor in what we get to buy.
 One question everyone seems to ask is: What kind of Brush Cleaner should I use for my makeup brushes? It’s a legitimate question. I mean you could spend a fortune trying all the ones out there on the market.
 So, the questions are, how much, where & what color. Yep, that pretty much describes how most of us feel about blush. Well, here’s a few pointers that might help.
 Does your black eye shadow always seem to look gray or worse blue-ish on you every time you apply it? You love that smoky eyed look that everyone else seems to always be able to rock, but the black is just not your friend?
 Tired of the morning lag? Tired of downing cups of coffee, which, in spite of it’s great taste, has some rather unpleasant side effects? First, it can make you jittery and wired, can give you a gross crash when it wears off. It is very addicting, ask any coffee drinker what happens on the morning they skip their daily dose. Headaches that will make you want to weep!